By the end of this lab, you will be able to:
• Configure standard static routes with different administrative distances
• Implement floating static routes for backup path redundancy
• Configure IP SLA (Service Level Agreement) for proactive link monitoring
• Use track objects to create intelligent failover mechanisms
• Integrate IP SLA with static routing for advanced path control
• Verify and troubleshoot route failover scenarios
• Understand the differences between traditional and intelligent failover methods
Lab Topology Description:
This lab features a dual-path redundant network between Router R1 and Router R2. Two GigabitEthernet links (G0/0 and G0/1) provide primary and backup connectivity. The scenario simulates a typical enterprise edge design where redundancy is critical.
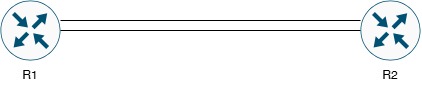
• R1 GigabitEthernet0/0 ↔ R2 GigabitEthernet0/0 (Primary Path)
• R1 GigabitEthernet0/1 ↔ R2 GigabitEthernet0/1 (Backup Path)
Topology Characteristics:
• Redundant dual-link design for high availability
• Primary and backup path architecture
• Suitable for IP SLA monitoring and track integration
Network Addressing Scheme:
| Device | Interface | IP Address | Subnet Mask | Description |
|---|---|---|---|---|
| R1 | GigabitEthernet0/0 | 10.1.1.1 | 255.255.255.252 | Primary Link to R2 |
| R1 | GigabitEthernet0/1 | 10.1.2.1 | 255.255.255.252 | Backup Link to R2 |
| R1 | Loopback0 | 1.1.1.1 | 255.255.255.255 | R1 Loopback (Source Network) |
| R2 | GigabitEthernet0/0 | 10.1.1.2 | 255.255.255.252 | Primary Link to R1 |
| R2 | GigabitEthernet0/1 | 10.1.2.2 | 255.255.255.252 | Backup Link to R1 |
| R2 | Loopback0 | 2.2.2.2 | 255.255.255.255 | R2 Loopback (Destination Network) |
| Network | Subnet | Purpose | VLAN/Link ID |
|---|---|---|---|
| 10.1.1.0/30 | 10.1.1.0 - 10.1.1.3 | R1-R2 Primary WAN Link | Primary Path |
| 10.1.2.0/30 | 10.1.2.0 - 10.1.2.3 | R1-R2 Backup WAN Link | Backup Path |
| 1.1.1.1/32 | Host Address | R1 Management/Test Network | Loopback |
| 2.2.2.2/32 | Host Address | R2 Management/Test Network | Loopback |
✓ Understanding of IP addressing and subnetting (CIDR notation)
✓ Basic knowledge of Cisco IOS CLI navigation and configuration modes
✓ Familiarity with static routing concepts and administrative distance
✓ Understanding of routing table operations and longest match rule
✓ Access to Cisco routers (physical or GNS3/EVE-NG/Packet Tracer)
✓ Console or SSH access to all devices
✓ All devices should be in factory default or clean configuration state
Business Context:
Your company operates a mission-critical WAN connection between two sites represented by R1 and R2. Due to the importance of this connectivity, the network team has deployed redundant links. Your task is to implement an intelligent routing solution that:
- Uses the primary link (G0/0) as the preferred path under normal conditions
- Automatically fails over to the backup link (G0/1) if the primary path fails
- Provides proactive monitoring to detect failures before routing protocols timeout
- Ensures minimal downtime during failover events
- Can be monitored and verified by network operations staff
You will implement three different failover strategies, progressing from basic to advanced:
- Basic Static Routes - Standard configuration with no redundancy
- Floating Static Routes - Traditional backup using administrative distance
- IP SLA with Track Objects - Intelligent failover with proactive monitoring
📌 Task 1: Basic Interface Configuration
Objective: Configure IP addresses on all interfaces and verify Layer 2/3 connectivity.
Step 1.1: Configure R1 Interfaces
Router> enable
Router# configure terminal
Router(config)# hostname R1
R1(config)#
! Configure Primary Link Interface
R1(config)# interface GigabitEthernet0/0
R1(config-if)# description ** Primary Link to R2 G0/0 **
R1(config-if)# ip address 10.1.1.1 255.255.255.252
R1(config-if)# no shutdown
R1(config-if)# exit
! Configure Backup Link Interface
R1(config)# interface GigabitEthernet0/1
R1(config-if)# description ** Backup Link to R2 G0/1 **
R1(config-if)# ip address 10.1.2.1 255.255.255.252
R1(config-if)# no shutdown
R1(config-if)# exit
! Configure Loopback Interface
R1(config)# interface Loopback0
R1(config-if)# description ** R1 Management/Test Network **
R1(config-if)# ip address 1.1.1.1 255.255.255.255
R1(config-if)# no shutdown
R1(config-if)# exit
R1(config)# end
R1# write memory
Step 1.2: Configure R2 Interfaces
Router> enable
Router# configure terminal
Router(config)# hostname R2
R2(config)#
! Configure Primary Link Interface
R2(config)# interface GigabitEthernet0/0
R2(config-if)# description ** Primary Link to R1 G0/0 **
R2(config-if)# ip address 10.1.1.2 255.255.255.252
R2(config-if)# no shutdown
R2(config-if)# exit
! Configure Backup Link Interface
R2(config)# interface GigabitEthernet0/1
R2(config-if)# description ** Backup Link to R1 G0/1 **
R2(config-if)# ip address 10.1.2.2 255.255.255.252
R2(config-if)# no shutdown
R2(config-if)# exit
! Configure Loopback Interface
R2(config)# interface Loopback0
R2(config-if)# description ** R2 Management/Test Network **
R2(config-if)# ip address 2.2.2.2 255.255.255.255
R2(config-if)# no shutdown
R2(config-if)# exit
R2(config)# end
R2# write memory
Step 1.3: Verify Interface Configuration
R1# show ip interface brief
R1# show interfaces description
! Verify connectivity
R1# ping 10.1.1.2
R1# ping 10.1.2.2
R2# ping 10.1.1.1
R2# ping 10.1.2.1
• All interfaces should be in "up/up" state
• Ping tests between directly connected interfaces should succeed (100% success rate)
• Interface descriptions should be visible in show commands
📌 Task 2: Configure Basic Static Routes (No Redundancy)
Objective: Implement basic static routes to understand baseline behavior before adding redundancy.
Step 2.1: Configure Static Route on R1
R1# configure terminal
! Static route to R2's Loopback network via primary link
R1(config)# ip route 2.2.2.2 255.255.255.255 10.1.1.2
R1(config)# end
R1# write memory
Step 2.2: Configure Static Route on R2
R2# configure terminal
! Static route to R1's Loopback network via primary link
R2(config)# ip route 1.1.1.1 255.255.255.255 10.1.1.1
R2(config)# end
R2# write memory
Step 2.3: Verify Basic Static Route Configuration
R1# show ip route static
R1# show ip route 2.2.2.2
R1# ping 2.2.2.2 source 1.1.1.1
R1# traceroute 2.2.2.2 source 1.1.1.1
! On R2:
R2# show ip route static
R2# show ip route 1.1.1.1
R2# ping 1.1.1.1 source 2.2.2.2
R2# traceroute 1.1.1.1 source 2.2.2.2
• Static routes have a default administrative distance (AD) of 1
• They remain in the routing table as long as the next-hop is reachable
• No automatic failover mechanism exists - if the primary link fails, connectivity is lost
• The next-hop IP address (10.1.1.2 or 10.1.1.1) must be directly connected
Step 2.4: Test Failure Scenario
R1# configure terminal
R1(config)# interface GigabitEthernet0/0
R1(config-if)# shutdown
R1(config-if)# exit
R1(config)# end
! Check routing table
R1# show ip route 2.2.2.2
! Notice the route is removed
! Verify connectivity is lost
R1# ping 2.2.2.2 source 1.1.1.1
! Ping will fail
! Restore the interface
R1# configure terminal
R1(config)# interface GigabitEthernet0/0
R1(config-if)# no shutdown
R1(config-if)# end
With basic static routes, when the primary link fails, there is NO automatic failover to the backup link. This results in complete connectivity loss until manual intervention. This is why we need floating static routes!
📌 Task 3: Configure Floating Static Routes (Traditional Redundancy)
Objective: Implement floating static routes using administrative distance to create automatic failover.
Understanding Floating Static Routes:
A floating static route is a backup static route that has a higher administrative distance than the primary route. It "floats" in the configuration but is not installed in the routing table unless the primary route fails.
• Connected Interface: 0
• Static Route: 1 (default)
• EIGRP: 90
• OSPF: 110
• RIP: 120
• Floating Static Route: Typically 5-254 (commonly 5, 10, or 50)
Step 3.1: Configure Floating Static Route on R1
R1# configure terminal
! Remove the old basic static route first
R1(config)# no ip route 2.2.2.2 255.255.255.255 10.1.1.2
! Primary static route via G0/0 (default AD = 1)
R1(config)# ip route 2.2.2.2 255.255.255.255 10.1.1.2 1
! Floating static route via G0/1 (higher AD = 5)
R1(config)# ip route 2.2.2.2 255.255.255.255 10.1.2.2 5
R1(config)# end
R1# write memory
Step 3.2: Configure Floating Static Route on R2
R2# configure terminal
! Remove the old basic static route first
R2(config)# no ip route 1.1.1.1 255.255.255.255 10.1.1.1
! Primary static route via G0/0 (default AD = 1)
R2(config)# ip route 1.1.1.1 255.255.255.255 10.1.1.1 1
! Floating static route via G0/1 (higher AD = 5)
R2(config)# ip route 1.1.1.1 255.255.255.255 10.1.2.1 5
R2(config)# end
R2# write memory
Step 3.3: Verify Floating Static Route Configuration
R1# show ip route static
R1# show ip route 2.2.2.2
! Should show route via 10.1.1.2 (primary path)
! View ALL static routes including floating (not in routing table)
R1# show running-config | include ip route
! You'll see BOTH routes configured
! Check administrative distance
R1# show ip route 2.2.2.2 | include metric
• Primary route (AD=1) via 10.1.1.2 should be in the routing table
• Floating route (AD=5) via 10.1.2.2 should be in configuration but NOT in routing table
• Ping from R1 to 2.2.2.2 should succeed using primary path
Step 3.4: Test Floating Static Route Failover
! On R1 - Start continuous ping in background
R1# ping 2.2.2.2 source 1.1.1.1 repeat 1000
! On a second R1 session, shutdown the primary interface:
R1# configure terminal
R1(config)# interface GigabitEthernet0/0
R1(config-if)# shutdown
R1(config-if)# end
! Immediately check routing table
R1# show ip route 2.2.2.2
! Route should now show via 10.1.2.2 (backup path)
! Verify connectivity is maintained
R1# ping 2.2.2.2 source 1.1.1.1
! Should succeed via backup path
! Verify path
R1# traceroute 2.2.2.2 source 1.1.1.1
! Should show 10.1.2.2 as next hop
! === Test Primary Link Recovery ===
! Bring primary interface back up
R1# configure terminal
R1(config)# interface GigabitEthernet0/0
R1(config-if)# no shutdown
R1(config-if)# end
! Wait a few seconds for interface to come up
R1# show ip route 2.2.2.2
! Route should revert to primary path via 10.1.1.2
! Verify connectivity
R1# ping 2.2.2.2 source 1.1.1.1
R1# traceroute 2.2.2.2 source 1.1.1.1
• Automatic failover to backup path when primary fails
• Automatic fallback to primary path when it recovers
• Simple to configure and understand
• No additional protocols required
• Failover only occurs when next-hop becomes unreachable (interface down)
• Cannot detect end-to-end path failures beyond next-hop
• No proactive monitoring of link quality or remote end reachability
• If next-hop remains up but path is broken downstream, failover won't occur
• This is where IP SLA becomes essential!
📌 Task 4: Configure IP SLA for Proactive Monitoring
Objective: Implement Cisco IP SLA to actively monitor end-to-end reachability and detect failures proactively.
What is IP SLA?
IP SLA (Service Level Agreement) is a Cisco IOS feature that generates and monitors synthetic traffic to measure network performance and verify end-to-end connectivity. Unlike floating static routes that only detect next-hop failures, IP SLA can detect failures anywhere along the path.
• Proactive network monitoring with synthetic traffic generation
• Measures network performance metrics (latency, jitter, packet loss)
• Detects failures beyond directly connected next-hop
• Multiple probe types: ICMP Echo, UDP Echo, TCP Connect, HTTP, DNS, etc.
• Integrates with Track objects for routing decisions
• Configurable frequency, timeout, and threshold values
Step 4.1: Configure IP SLA on R1
R1# configure terminal
! Create IP SLA operation (probe ID 1)
R1(config)# ip sla 1
! Use ICMP Echo to monitor R2's loopback (end-to-end test)
R1(config-ip-sla)# icmp-echo 2.2.2.2 source-ip 1.1.1.1
! Set probe frequency to every 5 seconds
R1(config-ip-sla-echo)# frequency 5
! Set timeout to 2 seconds
R1(config-ip-sla-echo)# timeout 2000
! Set threshold for performance degradation (in milliseconds)
R1(config-ip-sla-echo)# threshold 1000
R1(config-ip-sla-echo)# exit
! Schedule the IP SLA operation to start now and run forever
R1(config)# ip sla schedule 1 start-time now life forever
R1(config)# end
R1# write memory
• ip sla 1 - Creates IP SLA operation with ID 1
• icmp-echo 2.2.2.2 source-ip 1.1.1.1 - Sends ICMP pings from R1 loopback to R2 loopback
• frequency 5 - Sends probe every 5 seconds
• timeout 2000 - Waits 2000ms (2 seconds) for response before declaring failure
• threshold 1000 - Triggers threshold violation if RTT exceeds 1000ms (1 second)
• ip sla schedule 1 start-time now life forever - Starts operation immediately and runs continuously
Step 4.2: Verify IP SLA Operation
R1# show ip sla configuration 1
! Shows detailed configuration of IP SLA operation 1
R1# show ip sla statistics 1
! Shows current statistics including success/failure rate and RTT
R1# show ip sla statistics 1 details
! Shows detailed statistics with timestamps
R1# show ip sla summary
! Shows summary of all IP SLA operations
Expected Output Example:
IPSLAs Latest Operation Statistics
IPSLA operation id: 1
Latest RTT: 1 milliseconds
Latest operation start time: *12:30:15.123 UTC Mon Mar 1 2026
Latest operation return code: OK
Number of successes: 45
Number of failures: 0
Operation time to live: Forever
• IP SLA operation should be in "OK" state
• RTT (Round Trip Time) should be low (typically 1-10ms in lab)
• Success count should be increasing
• Failure count should remain at 0
• Return code should show "OK"
Step 4.3: Configure IP SLA on R2 (Optional - for bidirectional monitoring)
R2# configure terminal
! Create IP SLA operation (probe ID 1)
R2(config)# ip sla 1
R2(config-ip-sla)# icmp-echo 1.1.1.1 source-ip 2.2.2.2
R2(config-ip-sla-echo)# frequency 5
R2(config-ip-sla-echo)# timeout 2000
R2(config-ip-sla-echo)# threshold 1000
R2(config-ip-sla-echo)# exit
R2(config)# ip sla schedule 1 start-time now life forever
R2(config)# end
R2# write memory
📌 Task 5: Configure Track Objects to Monitor IP SLA
Objective: Create Track objects that monitor IP SLA state and can be used for intelligent routing decisions.
What are Track Objects?
Track objects provide a way to monitor the state of various network elements (interfaces, IP SLA operations, route reachability) and make that state available to other IOS features like static routing, HSRP, VRRP, or PBR. Track objects have two states: UP or DOWN.
• Monitors IP SLA operations and returns UP/DOWN state
• Can be referenced by static routes for intelligent failover
• Provides immediate failover when track object goes DOWN
• More granular control than AD-based floating routes
• Can combine multiple conditions with boolean logic (AND/OR)
Step 5.1: Configure Track Object on R1
R1# configure terminal
! Create Track object 1 to monitor IP SLA operation 1
R1(config)# track 1 ip sla 1 reachability
! Optional: Configure delay timers
! Wait 10 seconds before declaring track UP (prevents flapping)
R1(config-track)# delay down 10 up 10
R1(config-track)# exit
R1(config)# end
R1# write memory
• track 1 - Creates track object with ID 1
• ip sla 1 reachability - Monitors IP SLA operation 1 for reachability (OK/Failed)
• delay down 10 up 10 - Delays state change by 10 seconds to prevent route flapping
• Track is UP when IP SLA returns OK
• Track is DOWN when IP SLA fails or times out
Step 5.2: Verify Track Object Status
R1# show track
! Shows all track objects and their current state
R1# show track 1
! Shows detailed information about track object 1
R1# show track brief
! Shows brief summary of all track objects
Expected Output Example:
Track 1
IP SLA 1 reachability
Reachability is Up
1 change, last change 00:02:15
Delay up 10 secs, down 10 secs
Latest operation return code: OK
Latest RTT (millisecs) 1
Tracked by:
STATIC-IP-ROUTING 0
• Track object should be in "Up" state
• Should show "Reachability is Up"
• Should reference IP SLA 1
• Latest RTT should be visible
Step 5.3: Configure Track Object on R2 (Optional)
R2# configure terminal
R2(config)# track 1 ip sla 1 reachability
R2(config-track)# delay down 10 up 10
R2(config-track)# exit
R2(config)# end
R2# write memory
📌 Task 6: Integrate Track Objects with Static Routes
Objective: Configure static routes to use Track objects for intelligent, end-to-end path monitoring and failover.
Understanding Tracked Static Routes:
By associating a static route with a Track object, the route is only installed in the routing table when the Track object is UP. This provides more intelligent failover than AD-based floating routes because it monitors end-to-end reachability rather than just next-hop availability.
Step 6.1: Remove Previous Static Routes on R1
R1# configure terminal
! Remove previous static routes
R1(config)# no ip route 2.2.2.2 255.255.255.255 10.1.1.2 1
R1(config)# no ip route 2.2.2.2 255.255.255.255 10.1.2.2 5
! Verify routes are removed
R1(config)# do show ip route static
R1(config)# do show running-config | include ip route
Step 6.2: Configure Tracked Static Routes on R1
R1# configure terminal
! Primary route via G0/0 - Tracked by Track 1
! This route is ONLY installed when Track 1 is UP (IP SLA succeeds)
R1(config)# ip route 2.2.2.2 255.255.255.255 10.1.1.2 track 1
! Backup route via G0/1 - Not tracked, higher AD
! This route is installed when primary route is removed (Track 1 DOWN)
R1(config)# ip route 2.2.2.2 255.255.255.255 10.1.2.2 10
R1(config)# end
R1# write memory
Primary Route: ip route 2.2.2.2 255.255.255.255 10.1.1.2 track 1
• Installed ONLY when Track 1 is UP
• Default AD = 1 when installed
• Removed immediately when Track 1 goes DOWN
Backup Route: ip route 2.2.2.2 255.255.255.255 10.1.2.2 10
• Always installed when primary route is absent
• AD = 10 (higher than primary)
• Used automatically when primary route is removed
Result: Intelligent failover based on end-to-end reachability, not just next-hop status!
Step 6.3: Configure Tracked Static Routes on R2
R2# configure terminal
! Remove old routes
R2(config)# no ip route 1.1.1.1 255.255.255.255 10.1.1.1 1
R2(config)# no ip route 1.1.1.1 255.255.255.255 10.1.2.1 5
! Primary route via G0/0 - Tracked by Track 1
R2(config)# ip route 1.1.1.1 255.255.255.255 10.1.1.1 track 1
! Backup route via G0/1 - Not tracked
R2(config)# ip route 1.1.1.1 255.255.255.255 10.1.2.1 10
R2(config)# end
R2# write memory
Step 6.4: Verify Tracked Static Route Configuration
R1# show ip route static
! Should show primary route via 10.1.1.2
R1# show ip route 2.2.2.2
! Should show tracked route as active
R1# show running-config | include ip route
! Shows both routes in configuration
R1# show track 1
! Verify track is UP
! Check which routes are using the track object
R1# show track 1 | include Tracked
Expected Output Example:
Routing entry for 2.2.2.2/32
Known via "static", distance 1, metric 0
Routing Descriptor Blocks:
* 10.1.1.2
Route metric is 0, traffic share count is 1
R1# show track 1
Track 1
IP SLA 1 reachability
Reachability is Up
1 change, last change 00:15:23
Delay up 10 secs, down 10 secs
Latest operation return code: OK
Latest RTT (millisecs) 1
Tracked by:
STATIC-IP-ROUTING 0
• Track 1 should be UP
• Primary route (via 10.1.1.2) should be in routing table
• Backup route (via 10.1.2.2) should be in config but NOT in routing table
• "Tracked by: STATIC-IP-ROUTING" should appear in show track output
• Ping from R1 to 2.2.2.2 should succeed
📌 Task 7: Test IP SLA-Based Failover Scenarios
Objective: Verify that IP SLA track-based failover works correctly in various failure scenarios.
Test Scenario 1: Primary Link Failure
! Start continuous ping
R1# ping 2.2.2.2 source 1.1.1.1 repeat 1000 timeout 1
! In another terminal session, monitor routing table
R1# debug ip routing
! Check current route
R1# show ip route 2.2.2.2 | include via
! via 10.1.1.2 (should show primary path)
! Check track status
R1# show track 1 brief
! Track 1 IP SLA 1 reachability Up
! === Simulate Primary Link Failure ===
R1# configure terminal
R1(config)# interface GigabitEthernet0/0
R1(config-if)# shutdown
R1(config-if)# end
! === Monitor Failover Process ===
! Wait for IP SLA to detect failure (timeout + frequency = ~7 seconds)
! Watch the ping output - you'll see a few drops, then recovery
! After ~10-15 seconds, check track status:
R1# show track 1
! Should show "Reachability is Down" after delay timer expires
! Check routing table
R1# show ip route 2.2.2.2 | include via
! via 10.1.2.2 (should show backup path now!)
! Verify backup path is working
R1# traceroute 2.2.2.2 source 1.1.1.1
! Should show path through 10.1.2.2
! Check IP SLA statistics
R1# show ip sla statistics 1
! Should show failures
1. IP SLA probe fails when G0/0 goes down
2. After timeout (2 sec) + delay timer (10 sec), Track 1 goes DOWN
3. Primary tracked route is removed from routing table
4. Backup route (AD=10) via 10.1.2.2 is automatically installed
5. Ping resumes after brief interruption (10-15 seconds)
6. Traffic now flows through backup link
Test Scenario 2: Primary Link Recovery
R1# configure terminal
R1(config)# interface GigabitEthernet0/0
R1(config-if)# no shutdown
R1(config-if)# end
! === Monitor Recovery Process ===
! Wait for interface to come up and IP SLA to succeed
! Check interface status
R1# show ip interface brief GigabitEthernet0/0
! Monitor track status
R1# show track 1
! After delay timer (10 sec), should show "Reachability is Up"
! Check routing table
R1# show ip route 2.2.2.2 | include via
! via 10.1.1.2 (should revert to primary path)
! Verify primary path
R1# traceroute 2.2.2.2 source 1.1.1.1
! Should show 10.1.1.2 as next hop
! Check IP SLA success
R1# show ip sla statistics 1
! Success count should be increasing
1. Interface G0/0 comes back up
2. IP SLA probes succeed
3. After delay timer (10 sec), Track 1 goes UP
4. Primary tracked route (AD=1) is reinstalled
5. Backup route (AD=10) is removed due to higher AD
6. Traffic automatically reverts to primary path
7. Minimal service interruption during recovery
Test Scenario 3: Remote End (R2 Loopback) Failure
This test demonstrates the advantage of IP SLA over traditional floating routes - it can detect failures beyond the next-hop router.
R2# configure terminal
R2(config)# interface Loopback0
R2(config-if)# shutdown
R2(config-if)# end
! === On R1: Observe Failover ===
! IP SLA will fail because 2.2.2.2 is unreachable
! Even though both G0/0 links are up!
R1# show ip sla statistics 1
! Should show failures and "No connection" or "Timeout"
R1# show track 1
! After timeout + delay, should show Down
R1# show ip route 2.2.2.2
! Will show backup path via 10.1.2.2
! (Even though this won't help in this scenario - demonstrates the mechanism)
! === Restore R2 Loopback ===
R2# configure terminal
R2(config)# interface Loopback0
R2(config-if)# no shutdown
R2(config-if)# end
! On R1, track will go UP and primary route will be restored
This scenario shows that IP SLA with Track provides END-TO-END monitoring. A traditional floating static route (based only on next-hop reachability) would NOT detect this failure because the next-hop (10.1.1.2) is still reachable. IP SLA detects the actual destination (2.2.2.2) is unreachable and triggers failover.
Test Scenario 4: Monitoring Real-Time Failover
! Terminal 1: Continuous ping
R1# ping 2.2.2.2 source 1.1.1.1 repeat 10000 timeout 1
! Terminal 2: Monitor IP SLA
R1# while true; do show ip sla statistics 1 | include RTT; sleep 2; done
! Terminal 3: Monitor track status
R1# while true; do show track 1 brief; sleep 1; done
! Terminal 4: Monitor routing table
R1# debug ip routing
! Now perform shutdown/no shutdown on R1 G0/0 and observe:
! - Ping drops briefly during failover
! - IP SLA statistics change
! - Track state transitions
! - Route table updates
- ☐ Step 1: All interfaces are configured with correct IP addresses (show ip interface brief)
- ☐ Step 2: All interfaces are in "up/up" state (show interfaces status)
- ☐ Step 3: Direct connectivity between R1 and R2 via both links is functional (ping tests)
- ☐ Step 4: IP SLA operation 1 is configured and running on R1 (show ip sla configuration 1)
- ☐ Step 5: IP SLA operation shows "OK" status with successful probes (show ip sla statistics 1)
- ☐ Step 6: Track object 1 is configured and monitoring IP SLA 1 (show track 1)
- ☐ Step 7: Track object status is "Up" with "Reachability is Up" (show track 1)
- ☐ Step 8: Primary static route is installed via 10.1.1.2 track 1 (show ip route static)
- ☐ Step 9: Backup static route exists in config but not in routing table (show run | include ip route)
- ☐ Step 10: Ping from R1 loopback to R2 loopback is successful (ping 2.2.2.2 source 1.1.1.1)
- ☐ Step 11: Traceroute shows traffic using primary path via 10.1.1.2 (traceroute 2.2.2.2)
- ☐ Step 12: When G0/0 is shutdown, track goes Down after delay timer
- ☐ Step 13: Failover to backup route via 10.1.2.2 occurs automatically
- ☐ Step 14: When G0/0 is restored, track goes Up and primary route is restored
- ☐ Step 15: Failover and recovery occur within expected timeframes (10-15 seconds)
- ☐ Step 16: Configuration is saved on both routers (write memory)
- ☐ Step 17: Documentation updated with IP addresses and configuration details
All items in the verification checklist must be completed successfully. You should be able to demonstrate automatic failover and recovery in front of an instructor or document with screenshots/output captures.
R1 - Complete Final Configuration
! R1 Complete Configuration - Static Routes with IP SLA Track
!
hostname R1
!
! === Interface Configuration ===
!
interface Loopback0
description ** R1 Management/Test Network **
ip address 1.1.1.1 255.255.255.255
no shutdown
!
interface GigabitEthernet0/0
description ** Primary Link to R2 G0/0 **
ip address 10.1.1.1 255.255.255.252
no shutdown
!
interface GigabitEthernet0/1
description ** Backup Link to R2 G0/1 **
ip address 10.1.2.1 255.255.255.252
no shutdown
!
! === IP SLA Configuration ===
!
ip sla 1
icmp-echo 2.2.2.2 source-ip 1.1.1.1
frequency 5
timeout 2000
threshold 1000
!
ip sla schedule 1 start-time now life forever
!
! === Track Configuration ===
!
track 1 ip sla 1 reachability
delay down 10 up 10
!
! === Static Route Configuration ===
!
! Primary route - tracked by IP SLA
ip route 2.2.2.2 255.255.255.255 10.1.1.2 track 1
!
! Backup route - higher AD, not tracked
ip route 2.2.2.2 255.255.255.255 10.1.2.2 10
!
end
R2 - Complete Final Configuration
! R2 Complete Configuration - Static Routes with IP SLA Track
!
hostname R2
!
! === Interface Configuration ===
!
interface Loopback0
description ** R2 Management/Test Network **
ip address 2.2.2.2 255.255.255.255
no shutdown
!
interface GigabitEthernet0/0
description ** Primary Link to R1 G0/0 **
ip address 10.1.1.2 255.255.255.252
no shutdown
!
interface GigabitEthernet0/1
description ** Backup Link to R1 G0/1 **
ip address 10.1.2.2 255.255.255.252
no shutdown
!
! === IP SLA Configuration ===
!
ip sla 1
icmp-echo 1.1.1.1 source-ip 2.2.2.2
frequency 5
timeout 2000
threshold 1000
!
ip sla schedule 1 start-time now life forever
!
! === Track Configuration ===
!
track 1 ip sla 1 reachability
delay down 10 up 10
!
! === Static Route Configuration ===
!
! Primary route - tracked by IP SLA
ip route 1.1.1.1 255.255.255.255 10.1.1.1 track 1
!
! Backup route - higher AD, not tracked
ip route 1.1.1.1 255.255.255.255 10.1.2.1 10
!
end
show interfaces status
show interfaces description
show ip interface GigabitEthernet0/0
show ip route static
show ip route 2.2.2.2
show ip route 2.2.2.2 longer-prefixes
show running-config | include ip route
show ip sla configuration 1
show ip sla statistics
show ip sla statistics 1
show ip sla statistics 1 details
show ip sla summary
show ip sla history 1
show track 1
show track brief
show track 1 timers
ping 2.2.2.2 source 1.1.1.1 repeat 100
traceroute 2.2.2.2 source 1.1.1.1
traceroute 2.2.2.2 source 1.1.1.1 probe 1
debug ip icmp
debug track
debug ip sla trace
! Remember to disable debugging after troubleshooting:
undebug all
❌ Problem 1: IP SLA Shows "No Connection" or "Timeout"
Symptoms:
- show ip sla statistics shows failures
- Return code: "No connection" or "Timeout"
- Track object is Down
Troubleshooting Steps:
R1# show ip sla configuration 1
! Check: correct destination IP, source IP, timeout values
! Step 2: Verify interface status
R1# show ip interface brief
! Ensure both source and primary path interfaces are up
! Step 3: Test basic connectivity
R1# ping 2.2.2.2 source 1.1.1.1
! If this fails, IP SLA will also fail
! Step 4: Test next-hop connectivity
R1# ping 10.1.1.2
! Verify Layer 3 connectivity to next-hop
! Step 5: Check for routing issues
R1# show ip route 2.2.2.2
! Verify route exists (may need to temporarily remove track)
! Step 6: Verify IP SLA is scheduled and running
R1# show ip sla summary
! Ensure operation is Active
! Step 7: Check for access-lists blocking ICMP
R1# show ip access-lists
R2# show ip access-lists
! Ensure ICMP is not blocked
Common Causes:
- Destination IP address unreachable
- Interface down on primary path
- Access-list blocking ICMP
- Incorrect source IP in IP SLA configuration
- Timeout value too low for network conditions
Solution:
R1(config)# no ip sla 1
R1(config)# ip sla 1
R1(config-ip-sla)# icmp-echo 2.2.2.2 source-ip 1.1.1.1
R1(config-ip-sla)# timeout 2000
R1(config-ip-sla)# frequency 5
R1(config-ip-sla)# exit
R1(config)# ip sla schedule 1 start-time now life forever
! Fix 2: Increase timeout if network latency is high
R1(config)# ip sla 1
R1(config-ip-sla)# timeout 5000
R1(config-ip-sla)# exit
❌ Problem 2: Track Object Not Changing State
Symptoms:
- IP SLA is failing but Track remains Up
- IP SLA is succeeding but Track remains Down
- show track shows incorrect state
Troubleshooting Steps:
R1# show track 1
! Verify it's monitoring correct IP SLA operation
! Step 2: Check delay timers
R1# show track 1 timers
! May need to wait for delay timer to expire
! Step 3: Verify IP SLA operation number matches
R1# show ip sla summary
R1# show track 1
! Ensure track is monitoring correct IP SLA ID
! Step 4: Check track configuration
R1# show running-config | section track
! Verify syntax is correct
Common Causes:
- Delay timers not yet expired
- Track monitoring wrong IP SLA operation
- IP SLA operation not running
- Misconfigured track type (reachability vs state)
Solution:
R1(config)# no track 1
R1(config)# track 1 ip sla 1 reachability
R1(config-track)# delay down 10 up 10
R1(config-track)# exit
! Verify immediately
R1# show track 1
❌ Problem 3: Route Not Installing or Removing
Symptoms:
- Track is Up but route not in routing table
- Track is Down but primary route still installed
- Backup route not activating during failover
Troubleshooting Steps:
R1# show running-config | include ip route
! Check syntax: ip route [destination] [mask] [next-hop] track [track-id]
! Step 2: Verify track association
R1# show track 1
! Check "Tracked by: STATIC-IP-ROUTING"
! Step 3: Check routing table
R1# show ip route 2.2.2.2
R1# show ip route static
! Step 4: Verify administrative distance
R1# show ip route 2.2.2.2 | include distance
! Primary (tracked) should have AD=1
! Backup should have higher AD (e.g., 10)
! Step 5: Check for routing conflicts
R1# show ip route 2.2.2.2 longer-prefixes
! Ensure no more specific routes exist
Common Causes:
- Incorrect track ID in static route command
- Backup route has lower AD than primary
- Next-hop address unreachable
- Syntax error in static route command
- More specific route taking precedence
Solution:
R1(config)# no ip route 2.2.2.2 255.255.255.255 10.1.1.2
R1(config)# no ip route 2.2.2.2 255.255.255.255 10.1.2.2
! Primary route with track (AD=1 default)
R1(config)# ip route 2.2.2.2 255.255.255.255 10.1.1.2 track 1
! Backup route with higher AD (must be > 1)
R1(config)# ip route 2.2.2.2 255.255.255.255 10.1.2.2 10
! Verify
R1# show ip route static
R1# show track 1
❌ Problem 4: Failover Takes Too Long
Symptoms:
- Connectivity lost for extended period during failover
- Failover takes 30+ seconds
- Applications time out during failover
Troubleshooting Steps:
R1# show ip sla configuration 1 | include frequency|timeout
! Frequency = how often probe is sent
! Timeout = how long to wait for response
! Step 2: Check track delay timers
R1# show track 1 | include Delay
! Delay down/up adds time before state change
! Step 3: Calculate total failover time
! Formula: timeout + delay down = total failover time
! Example: 2000ms timeout + 10sec delay = 12 seconds
! Step 4: Monitor actual failover time
R1# ping 2.2.2.2 source 1.1.1.1 repeat 1000
! Count failed pings * 1 second = downtime
Common Causes:
- IP SLA timeout too long
- Track delay timers too conservative
- IP SLA frequency too low
- Multiple components adding to total delay
Solution - Tune Timers for Faster Failover:
R1(config)# ip sla 1
R1(config-ip-sla)# timeout 1000
R1(config-ip-sla)# frequency 3
R1(config-ip-sla)# exit
! Reduce track delay timers
R1(config)# track 1
R1(config-track)# delay down 5 up 5
R1(config-track)# exit
! New failover time: 1sec timeout + 5sec delay = 6 seconds
• Don't set timeout too low - may cause false positives on slow networks
• Don't eliminate delay timers - they prevent route flapping
• Balance fast failover vs. stability
• Production recommendation: timeout=2000ms, delay=5-10sec
• Test thoroughly after any timer changes
❌ Problem 5: Route Flapping (Unstable Routes)
Symptoms:
- Routes constantly installing and removing
- Track object rapidly changing between Up and Down
- Logs show frequent routing changes
- Inconsistent ping results
Troubleshooting Steps:
R1# show track 1
! Look at "changes" counter - should be low
! If high (dozens or hundreds), indicates flapping
! Step 2: Monitor IP SLA success/failure ratio
R1# show ip sla statistics 1
! Check success vs failure counts
! Intermittent failures indicate unstable link
! Step 3: Check for interface flapping
R1# show interfaces GigabitEthernet0/0
! Look for increasing input/output errors
! Check "5 minute" input/output rate
! Step 4: Enable logging to see pattern
R1# configure terminal
R1(config)# track timer 1
R1(config)# end
R1# terminal monitor
R1# debug track
! Watch for rapid state changes
Common Causes:
- Marginal link quality (packet loss)
- Delay timers too short
- Timeout too aggressive for network conditions
- Duplex mismatch or CRC errors on interface
- Intermittent physical layer issues
Solution:
R1(config)# track 1
R1(config-track)# delay down 15 up 15
R1(config-track)# exit
! Fix 2: Increase IP SLA timeout
R1(config)# ip sla 1
R1(config-ip-sla)# timeout 3000
R1(config-ip-sla)# exit
! Fix 3: Require multiple failures before declaring down
R1(config)# track 1
R1(config-track)# react 1 failures 3
R1(config-track)# exit
! Fix 4: Check interface errors
R1# show interfaces GigabitEthernet0/0
! If errors present, investigate physical layer
❌ Problem 6: Backup Route Never Activates
Symptoms:
- Primary link fails but backup route doesn't install
- Complete connectivity loss during failover
- show ip route shows no route to destination
Troubleshooting Steps:
R1# show running-config | include ip route
! Should see both primary and backup routes
! Step 2: Check backup route next-hop reachability
R1# ping 10.1.2.2
! Backup next-hop must be reachable
! Step 3: Verify backup interface is up
R1# show ip interface brief GigabitEthernet0/1
! Step 4: Check administrative distance
R1# show running-config | include ip route 2.2.2.2
! Backup must have HIGHER AD than primary
! Step 5: Temporarily remove primary route to test backup
R1(config)# no ip route 2.2.2.2 255.255.255.255 10.1.1.2 track 1
R1# show ip route 2.2.2.2
! Backup should install
Common Causes:
- Backup route not configured
- Backup route has same or lower AD as primary
- Backup interface is down
- Backup next-hop is unreachable
- Typo in backup route configuration
Solution:
R1(config)# ip route 2.2.2.2 255.255.255.255 10.1.2.2 10
! AD must be higher than primary (1 < 10 ✓)
! Verify backup interface is up and configured
R1(config)# interface GigabitEthernet0/1
R1(config-if)# no shutdown
R1(config-if)# exit
! Test backup route manually
R1# show ip route 2.2.2.2
! When primary is down, backup should be active
1. Static Route Fundamentals
- Default AD = 1: Static routes are preferred over dynamic routing protocols (except connected routes)
- Manual Configuration: No automatic discovery of topology changes
- Next-Hop Dependency: Route is installed only if next-hop is reachable
- Use Cases: Stub networks, default routes, policy routing, small networks
2. Floating Static Routes
- AD-Based Redundancy: Higher AD = lower preference
- Automatic Failover: Backup route activates when primary fails
- Limitation: Only detects next-hop failures, not end-to-end failures
- Simple Implementation: No additional features required
- Common AD Values: Primary=1, Backup=5 or 10 or 50
3. IP SLA (Service Level Agreement)
- Proactive Monitoring: Actively tests network paths
- Multiple Probe Types: ICMP, UDP, TCP, HTTP, DNS, VoIP
- Performance Metrics: RTT, jitter, packet loss, MOS scores
- Synthetic Traffic: Generates test traffic without affecting production
- End-to-End Testing: Detects failures beyond next-hop
- Configurable Thresholds: Define acceptable performance levels
4. Track Objects
- State Machine: Binary UP/DOWN state based on monitored object
- Multiple Monitoring Types: Interface line-protocol, IP route, IP SLA, list
- Integration Point: Links monitoring with routing decisions
- Delay Timers: Prevent route flapping during transient failures
- Boolean Logic: Can combine multiple conditions with AND/OR
5. IP SLA + Track Integration Benefits
- Intelligent Failover: Based on actual end-to-end reachability
- Faster Detection: Proactive vs reactive monitoring
- Path Quality: Can measure performance, not just up/down
- Flexible Criteria: Customize what constitutes a "failure"
- Production Ready: Industry standard for mission-critical links
6. Failover Timing Calculations
- Basic Failover: Interface down detection = instant (carrier loss)
- Floating Route: Next-hop unreachable = ~3 seconds (ARP timeout)
- IP SLA Failover: timeout + delay down = total failover time
- Example: 2-second timeout + 10-second delay = 12-second failover
- Tuning Trade-off: Faster failover vs stability/route flapping
7. Administrative Distance Reference
| Route Source | Default AD | Trustworthiness |
|---|---|---|
| Connected | 0 | Highest |
| Static | 1 | Very High |
| EIGRP Summary | 5 | High |
| External BGP | 20 | High |
| Internal EIGRP | 90 | Medium-High |
| OSPF | 110 | Medium |
| IS-IS | 115 | Medium |
| RIP | 120 | Low |
| External EIGRP | 170 | Low |
| Internal BGP | 200 | Lowest |
| Unknown/Unreachable | 255 | Never Used |
8. Design Best Practices
- Use Track for Critical Paths: Don't rely solely on AD for important links
- Set Appropriate Timers: Balance detection speed vs stability
- Monitor Both Directions: Configure IP SLA on both ends of link
- Document Configurations: Clear descriptions and comments
- Test Failover Regularly: Verify automatic recovery works
- Log and Alert: Integrate with SNMP/syslog for monitoring
- Consider Load: IP SLA generates traffic - ensure it's acceptable
9. Comparison: Floating Route vs IP SLA Track
| Feature | Floating Static Route | IP SLA with Track |
|---|---|---|
| Configuration Complexity | Simple | Moderate |
| Failure Detection | Next-hop only | End-to-end |
| Failover Speed | Fast (seconds) | Configurable (5-15 sec typical) |
| Monitoring | Passive | Active/Proactive |
| Detects Downstream Issues | No | Yes |
| Performance Monitoring | No | Yes (RTT, jitter, loss) |
| Additional Features Required | None | IP SLA (included in IOS) |
| Use Case | Simple backup links | Mission-critical redundancy |
| Routing Protocol Integration | Can coexist with AD tuning | Can coexist, track overrides AD |
10. When to Use Each Method
Use Basic Static Routes When:
- Single path with no redundancy required
- Stub networks with one exit point
- Simple lab or test environments
- Default route to ISP
Use Floating Static Routes When:
- Backup path with different next-hop
- Simple redundancy is acceptable
- Links directly connected (next-hop failure = path failure)
- Budget or equipment limitations prevent IP SLA
- Quick implementation without advanced features
Use IP SLA with Track When:
- Mission-critical connectivity requiring high availability
- Need to detect failures beyond next-hop router
- WAN links where provider edge is separate from destination
- Requirement for performance monitoring (SLA compliance)
- Multiple intermediate hops between source and destination
- Need to measure and guarantee service levels
- Integration with other track-aware features (HSRP, PBR)
1. Multiple Track Objects with Boolean Logic
Combine multiple track objects using AND/OR logic for complex failover scenarios:
R1(config)# track 10 list boolean and
R1(config-track)# object 1
R1(config-track)# object 2
R1(config-track)# exit
! Create track list with OR logic (either must be up)
R1(config)# track 11 list boolean or
R1(config-track)# object 1
R1(config-track)# object 2
R1(config-track)# exit
! Use combined track in routing
R1(config)# ip route 0.0.0.0 0.0.0.0 10.1.1.2 track 10
2. IP SLA with HTTP Monitoring
Monitor web application availability instead of just ICMP:
R1(config)# ip sla 2
R1(config-ip-sla)# http get http://192.168.1.100/index.html
R1(config-ip-sla-http)# timeout 5000
R1(config-ip-sla-http)# frequency 10
R1(config-ip-sla-http)# exit
R1(config)# ip sla schedule 2 start-time now life forever
3. IP SLA with UDP Jitter (VoIP Monitoring)
Monitor network quality for voice/video applications:
R1(config)# ip sla 3
R1(config-ip-sla)# udp-jitter 10.1.1.2 5060 codec g711ulaw
R1(config-ip-sla-jitter)# frequency 30
R1(config-ip-sla-jitter)# exit
R1(config)# ip sla schedule 3 start-time now life forever
! Track based on MOS score
R1(config)# track 3 ip sla 3 state
4. IP SLA with TCP Connect
Monitor specific TCP services (SSH, Telnet, custom ports):
R1(config)# ip sla 4
R1(config-ip-sla)# tcp-connect 10.1.1.2 22
R1(config-ip-sla-tcp)# timeout 3000
R1(config-ip-sla-tcp)# frequency 10
R1(config-ip-sla-tcp)# exit
R1(config)# ip sla schedule 4 start-time now life forever
5. Integration with HSRP/VRRP
Use track objects to adjust HSRP priority based on upstream connectivity:
R1(config)# interface GigabitEthernet0/2
R1(config-if)# ip address 192.168.1.1 255.255.255.0
R1(config-if)# standby 1 ip 192.168.1.254
R1(config-if)# standby 1 priority 110
R1(config-if)# standby 1 preempt
R1(config-if)# standby 1 track 1 decrement 20
! If track 1 goes down, priority drops from 110 to 90
! Backup router with priority 100 becomes active
6. Policy-Based Routing (PBR) with Track
Use track objects to dynamically change traffic path based on connectivity:
R1(config)# route-map PBR-PRIMARY permit 10
R1(config-route-map)# match ip address 100
R1(config-route-map)# set ip next-hop verify-availability 10.1.1.2 1 track 1
R1(config-route-map)# set ip next-hop 10.1.2.2
R1(config-route-map)# exit
! Apply to interface
R1(config)# interface GigabitEthernet0/2
R1(config-if)# ip policy route-map PBR-PRIMARY
7. IP SLA Responder for Enhanced Accuracy
Configure IP SLA responder on destination for more accurate measurements:
R2(config)# ip sla responder
! On R1 (source):
R1(config)# ip sla 5
R1(config-ip-sla)# udp-echo 10.1.1.2 5000
R1(config-ip-sla-echo)# control enable
R1(config-ip-sla-echo)# frequency 5
R1(config-ip-sla-echo)# exit
R1(config)# ip sla schedule 5 start-time now life forever
8. SNMP Integration for Monitoring
Configure SNMP traps when track objects change state:
R1(config)# snmp-server enable traps event-manager
R1(config)# snmp-server host 192.168.1.100 version 2c public
R1(config)# snmp-server community public RO
! Track state changes will generate SNMP traps
9. Syslog Integration
Log track and IP SLA events to syslog server:
R1(config)# logging host 192.168.1.100
R1(config)# logging trap informational
R1(config)# logging facility local6
! Track events automatically logged
! IP SLA events automatically logged
10. EEM (Embedded Event Manager) Integration
Trigger custom scripts when track objects change state:
R1(config)# event manager applet TRACK_FAILOVER
R1(config-applet)# event track 1 state down
R1(config-applet)# action 1.0 syslog msg "Primary path failed - failover activated"
R1(config-applet)# action 2.0 cli command "enable"
R1(config-applet)# action 2.1 cli command "show ip route"
R1(config-applet)# action 3.0 mail server "smtp.company.com" \
to "netadmin@company.com" from "router@company.com" \
subject "R1 Primary Path Failure" \
body "Primary WAN link has failed. Backup link is now active."
Problem: Without delay timers, temporary link flaps cause immediate route changes, leading to instability.
Solution: Always configure delay timers: delay down 10 up 10 (or appropriate values for your network).
Problem: If backup route has AD ≤ primary, both routes installed (load balancing) or backup preferred.
Solution: Backup AD must be HIGHER: Primary AD=1, Backup AD=5 or 10.
Problem: Timeout < actual network RTT causes false positives and unnecessary failovers.
Solution: Set timeout to 3-5x normal RTT. For 10ms RTT, use 2000-5000ms timeout.
Problem: IP SLA configured but not scheduled = never runs = track always down.
Solution: Always include: ip sla schedule [id] start-time now life forever
Problem: Track 1 monitors IP SLA 2 instead of IP SLA 1 = incorrect state.
Solution: Verify: show track 1 | include SLA - ensure correct operation number.
Problem: Assume configuration works, but discover issues during actual outage.
Solution: Always test: shutdown interface, verify failover, restore, verify recovery.
Problem: Not understanding that track must be UP for route to install.
Solution: Always verify track state: show track [id] before troubleshooting routes.
Problem: IP SLA pings next-hop instead of actual destination = doesn't detect end-to-end failure.
Solution: IP SLA should monitor final destination or critical intermediate point, not just next-hop.
Problem: Configuration lost after reload.
Solution: Always: write memory or copy run start after configuration changes.
Problem: Months later, nobody knows why specific timer values were chosen.
Solution: Use interface descriptions and comments to document design decisions.
What You Accomplished:
✅ Completed Configuration Tasks:
- Configured dual-path redundant network topology
- Implemented basic static routes
- Configured floating static routes for AD-based failover
- Deployed Cisco IP SLA for proactive network monitoring
- Created track objects to monitor IP SLA state
- Integrated track objects with static routes for intelligent failover
- Tested multiple failover scenarios
- Verified automatic recovery mechanisms
- Documented complete working configuration
✅ Skills Developed:
- Understanding of static route fundamentals and AD manipulation
- Configuration of IP SLA for network monitoring
- Implementation of track objects for intelligent routing decisions
- Troubleshooting routing and failover issues
- Performance tuning of timers and thresholds
- Verification techniques using show and debug commands
- Network design for high availability
✅ CCNP Exam Relevance:
- CCNP 350-401 ENCOR: Topic 3.1 - Layer 3 Technologies (Static Routing)
- CCNP 300-410 ENARSI: Topic 1.1 - EIGRP (Path Control)
- CCNP 300-410 ENARSI: Topic 1.4 - Routing Protocol Operations (Failover)
- CCNP 350-401 ENCOR: Topic 1.6 - Network Assurance (IP SLA)
Recommended Follow-Up Labs:
- Lab 10.2: Policy-Based Routing (PBR) with Track Objects
- Lab 10.3: HSRP/VRRP with IP SLA Tracking
- Lab 10.4: Advanced IP SLA (HTTP, DNS, TCP, VoIP)
- Lab 11.1: EIGRP Path Control and Manipulation
- Lab 11.2: OSPF Path Selection and Cost Tuning
- Lab 12.1: BGP Path Manipulation
Practice Exercises:
- Modify the lab to use three parallel links with prioritization (primary, secondary, tertiary)
- Configure bidirectional IP SLA monitoring on both R1 and R2
- Implement threshold-based failover (switch if RTT > 100ms)
- Add HTTP monitoring to track web server availability
- Integrate with SNMP and configure trap generation
- Create EEM scripts to automate failover notifications
- Configure IP SLA responder for more accurate measurements
- Implement load balancing across both links using PBR
Real-World Application:
The skills learned in this lab are directly applicable to:
- Dual-ISP edge router configurations
- Branch office WAN redundancy
- Data center exit point failover
- MPLS primary with Internet backup scenarios
- Active/standby firewall pair configurations
- Cloud connectivity with multiple paths (DX + VPN)
- SD-WAN overlay redundancy designs
Cisco Documentation:
Recommended Reading:
- CCNP and CCIE Enterprise Core ENCOR 350-401 Official Cert Guide
- CCNP Enterprise Advanced Routing ENARSI 300-410 Official Cert Guide
- Cisco IOS Cookbook (O'Reilly) - Chapter 21: IP SLA
- Network Warrior (O'Reilly) - Chapter 18: High Availability
You have successfully completed Lab 10.1: Static Routing, Floating Routes & IP SLA Tracking.
Lab Completion Date: _________________
Instructor Signature: _________________
Student Name: _________________
Skills Verified:
☑ Static route configuration
☑ Floating route implementation
☑ IP SLA configuration and monitoring
☑ Track object integration
☑ Failover testing and verification
☑ Troubleshooting network redundancy
Next Recommended Lab: Lab 10.2 - Policy-Based Routing (PBR)
CCNP Progress: Layer 3 Fundamentals ✓ | Routing Protocols ○ | Path Manipulation ○ | BGP ○
This lab was designed for Cisco IOS routers (physical or virtual). Commands may vary slightly depending on IOS version. Tested on:
• Cisco IOS Software, C2900 Software (C2900-UNIVERSALK9-M), Version 15.x
• GNS3 Version 2.2+ with IOS images
• EVE-NG with Cisco IOSv images
• Cisco Packet Tracer 8.x (limited IP SLA support)
For production deployment, always test in a non-production environment first and follow organizational change management procedures.